
Introduction
It’s no secret that Windows is becoming increasingly bloated and less suited for productivity with each passing update. While Linux remains the most suited OS for productivity, especially in the IT and cybersecurity industry, it’s undeniable that Windows has the better UI, graphics, audio drivers, applications, and general support. Fortunately, there are several ways to bring Windows up to speed with the productivity powerhouse that is Linux!
Why Windows Sucks
There are several crucial reasons behind why Windows is such an awful productivity experience:
- Bloatware: Microsoft is notorious for bundling unnecessary software with their operating system that demolishes RAM and CPU cycles for no reason. Most of this bloat is absolutely useless for professionals. The occasional freezes and microstutters are a nuisance.
- Lack of CLI Support: While Windows does have Batch and PowerShell, they are absolutely deprived compared to the power of Linux’s Bash. Few people bother learning PowerShell’s syntax, for good reason.
- Awful Desktop Environment: Windows Explorer leaves much to be desired. It’s slow, feels clunky, and doesn’t have an effective way to manage a busy environment. Virtual desktops are a sorry excuse for productivity.
- Atrocious Windows 11 Taskbar and Context Menu: Seriously, is there anyone who liked the new taskbar and context menu of Windows 11? I never want to right-click, then left-click to expand the context menu. It’s so frustrating!
- No Centralized Package Management: Unlike Linux, which has package managers like APT, YUM, DNF, and Homebrew, Windows lacks a central package manager.
- Terrible Windows Search and Application Launchers: Windows Search is ubiquitously know as one of the worst piece of software ever made. It’s slow, inaccurate, and just doesn’t work most of the time.
Luckily, if you value the positives of Windows, of which there are quite a few, there are ways to address these issues.
Bloatware
Solution: Installing Windows with Customized Unattended Install
The first step in our journey of improving the Windows experience is to install Windows with almost zero bloat. To do this, we’ll grab an official ISO from Microsoft and use an unattended install to debloat and customize it during installation. There are several great unattended install definitions that work well, but my personal favorite is the unattended generator by Schneegans. This generator lets you easily customize your experience and choose what bloat to exclude. To use this unattended install xml, you can simply put it in the root directory of the Windows ISO and boot from it. The installation will then proceed with the settings you’ve configured in the XML file. Alternatively if you use Ventoy, you can specify a ventoy autoinstall definition to automatically install the unattended xml file during boot.
Ventoy Autoinstall Example
{
    "auto_install": [
        {
            "image": "/ISO/windows-11.iso",
            "template": [
                "/ventoy/script/autounattend.xml"
            ],
            "timeout": 10
        }
    ]
}
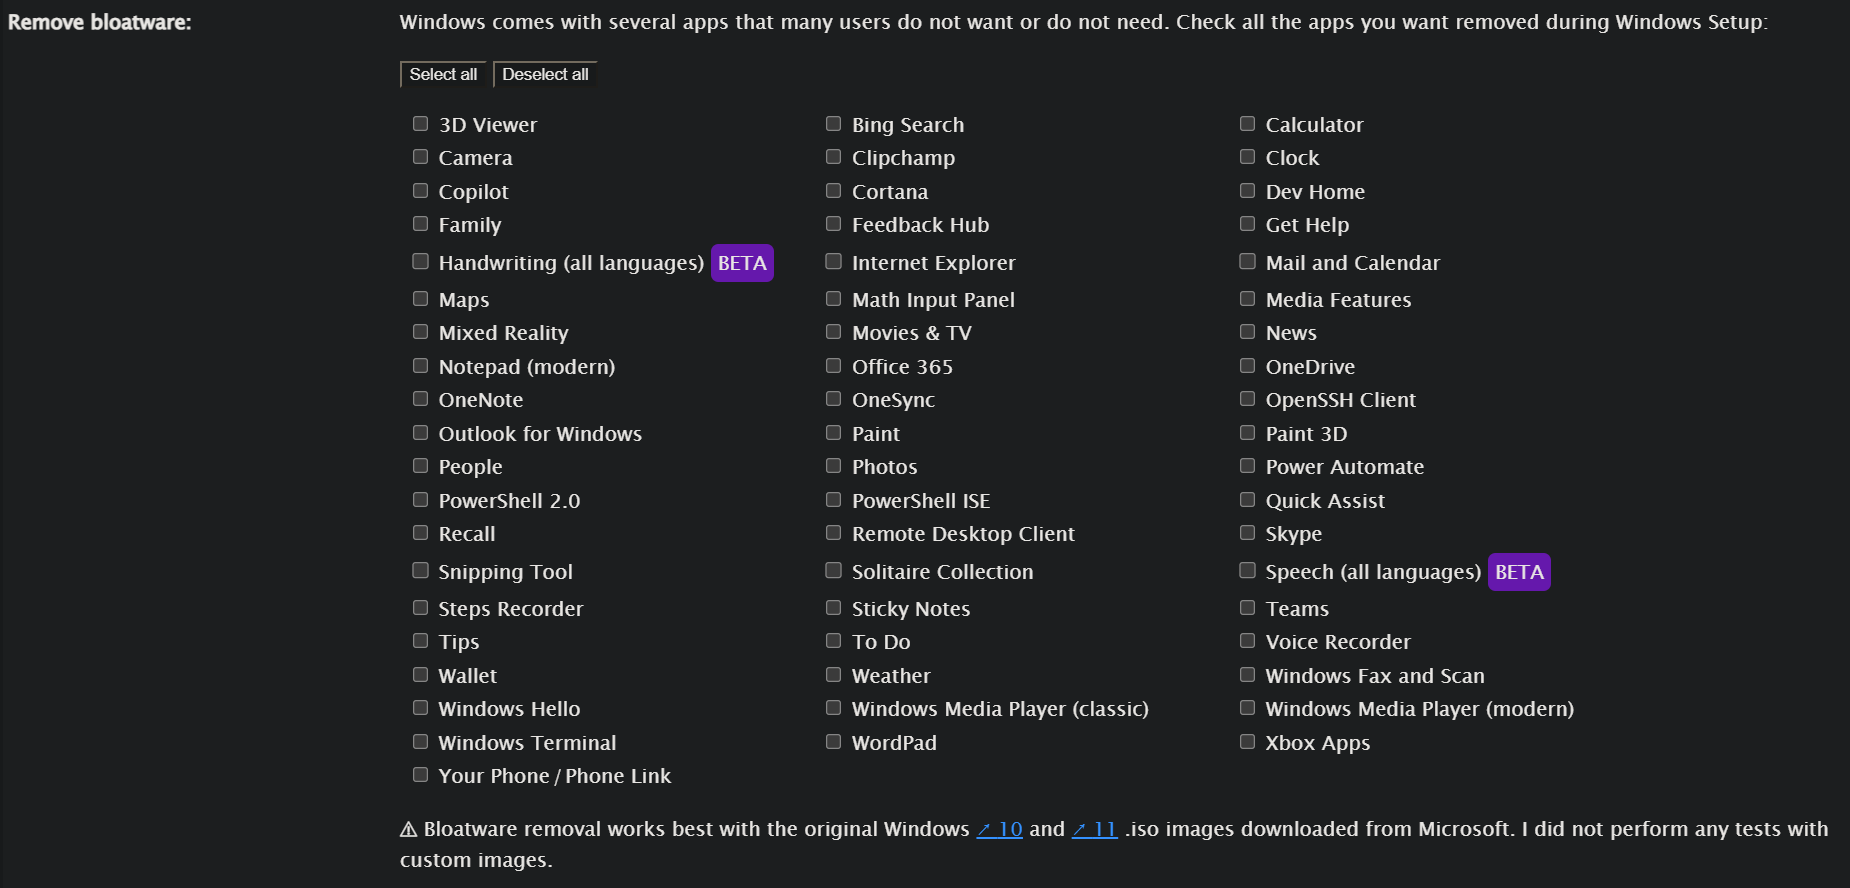
As a bonus, you can use Shutup 10 to further customize your Windows post-installation, and manually disable any service you might not want.
Lack of CLI Support
Solution: WSL
Ironically, the best thing to come to Windows has been Linux. There’s no fixing the Windows Batch or PowerShell, so instead of fighting that, we’ll use Linux! Windows Subsystem for Linux allows you to run a lightweight Linux distribution in Hyper-V VM. This VM integrates very well with Windows and allows you to run both Linux and Windows binaries, and interact with the Windows filesystem that’s mounted directly into your Linux VM. I like to symlink my Desktop, Downloads, and Documents folders from Windows into my WSL instance. On top of that, WSL also integrates very well with VSCode, letting you run a VSCode server within WSL. This allows you to use Git and other tools directly from your Linux environment instead of dealing with Windows. It even lets you run GUI Linux applications if you need that for whatever reason.
As a bonus, you can use Windows Terminal’s Quake mode to quickly bring down a WSL terminal from anywhere in your Windows environment with a keyboard shortcut. I use this extensively and avoid touching Windows CMD or PowerShell.
Awful Desktop Environment
Solution: Komorebi
Linux has the luxury of tiling managers like i3 and Hyprland. Luckily, thanks to Komorebi, Windows can have a tiling manager too! This amazing project transforms the awful Windows desktop environment into something much more manageable and productive. Komorebi is the inspiration behind this blog post and it truly makes using Windows infinitely easier. Komorebi tiles your open windows automatically into whatever grid you like and allows you to set hotkeys for everything from snapping windows to moving them between workspaces. Komorebi allows you to manage multiple “workspaces” which are more akin to workspaces than virtual desktops. Komorebi, like any tiling manager, has a steep learning curve. But if you are willing to learn it, it can hugely increase your productivity. It’s a game changer and I highly recommend it.
My Komorebi Configuration
{
  "$schema": "https://raw.githubusercontent.com/LGUG2Z/komorebi/v0.1.37/schema.json",
  "app_specific_configuration_path": "$Env:USERPROFILE/applications.json",
  "window_hiding_behaviour": "Cloak",
  "cross_monitor_move_behaviour": "Insert",
  "default_workspace_padding": 5,
  "default_container_padding": 5,
  "border": true,
  "border_width": 4,
  "border_offset": -1,
  "animation": {
    "enabled": true,
    "duration": 100,
    "fps": 240,
    "style": "EaseInOutSine"
  },
  "transparency": true,
  "transparency_alpha": 245,
  "border_style": "System",
  "border_colours": {
    "single": "#90D5FF",
    "stack": "#00a542",
    "monocle": "#ff3399",
    "unfocused": "#808080"
  },
  "mouse_follows_focus": false,
  "theme": {
    "palette": "Base16",
    "name": "Monokai",
    "unfocused_border": "Base03",
    "bar_accent": "Base0D"
  },
  "display_index_preferences": {
    "0": "5GW5YZ3",
    "1": "MSI3DB7-5&8b993b&1&UID4355",
    "2": "T1TAA0018527"
  },
  "monitors": [
    {
      "workspaces": [
        {
          "name": "1I",
          "layout": "Grid"
        },
        {
          "name": "1II",
          "layout": "Grid"
        },
        {
          "name": "1III",
          "layout": "Grid"
        }
      ]
    },
    {
      "workspaces": [
        {
          "name": "2I",
          "layout": "Grid"
        },
        {
          "name": "2II",
          "layout": "Grid"
        },
        {
          "name": "2III",
          "layout": "Grid"
        }
      ]
    },
    {
      "workspaces": [
        {
          "name": "3I",
          "layout": "VerticalStack"
        },
        {
          "name": "3II",
          "layout": "VerticalStack"
        },
        {
          "name": "3III",
          "layout": "VerticalStack"
        }
      ]
    }
  ],
    "floating_applications": [
    {
      "kind": "Title",
      "id": "Ubuntu",
      "matching_strategy": "Equals"
    },
    {
      "kind": "Exe",
      "id": "vmware.exe",
      "matching_strategy": "Equals"
    }
  ]
}
My WHKD Keybind Configuration
.shell powershell

# General system controls
win + shift + r         : komorebic reload-configuration; taskkill /f /im whkd.exe; Start-Process whkd -WindowStyle hidden

# Window management
win + shift + q         : komorebic close

# Toggle transparency

win + t                 : komorebic toggle-transparency

# Focus windows - support both HJKL and arrow keys as in your config
win + left              : komorebic focus left
win + down              : komorebic focus down
win + up                : komorebic focus up
win + right             : komorebic focus right

# Move windows - support both HJKL and arrow keys
win + shift + left      : komorebic move left
win + shift + down      : komorebic move down
win + shift + up        : komorebic move up
win + shift + right     : komorebic move right

# Split orientation
win + shift + h         : komorebic flip-layout horizontal
win + shift + v         : komorebic flip-layout vertical

# Fullscreen
win + f                 : komorebic toggle-monocle

# Pause
win + p : komorebic toggle-pause

# Shortcuts help
win + h                 : komorebic toggle-shortcuts

# Layout modes
win + shift + e         : komorebic cycle-layout next

# Floating controls
win + shift + space     : komorebic toggle-float

# Parent/child focus (equivalent to i3's focus parent)
win + a                 : komorebic focus-parent

# Workspaces - using your numbered workspaces
win + 1                 : komorebic focus-workspaces 0
win + 2                 : komorebic focus-workspaces 1
win + 3                 : komorebic focus-workspaces 2
win + 4                 : komorebic focus-workspaces 3
win + 5                 : komorebic focus-workspaces 4
win + 6                 : komorebic focus-workspaces 5
win + 7                 : komorebic focus-workspaces 6
win + 8                 : komorebic focus-workspaces 7
win + 9                 : komorebic focus-workspaces 8
win + 0                 : komorebic focus-workspaces 9

# Move containers to workspaces
win + shift + 1         : komorebic move-to-workspace 0
win + shift + 2         : komorebic move-to-workspace 1
win + shift + 3         : komorebic move-to-workspace 2
win + shift + 4         : komorebic move-to-workspace 3
win + shift + 5         : komorebic move-to-workspace 4
win + shift + 6         : komorebic move-to-workspace 5
win + shift + 7         : komorebic move-to-workspace 6
win + shift + 8         : komorebic move-to-workspace 7
win + shift + 9         : komorebic move-to-workspace 8
win + shift + 0         : komorebic move-to-workspace 9

# Force Manage and Unmanage
win + m                 : komorebic manage
win + shift + m         : komorebic unmanage

# Retile
win + r                 : komorebic retile

# Toggle Lock
win + d                 : komorebic toggle-lock
As a bonus, Komorebi also has a feature called “Komorebi Bar” which can replace the default Windows taskbar. Altsnap pairs super well with it too!
Taskbar and Context Menu
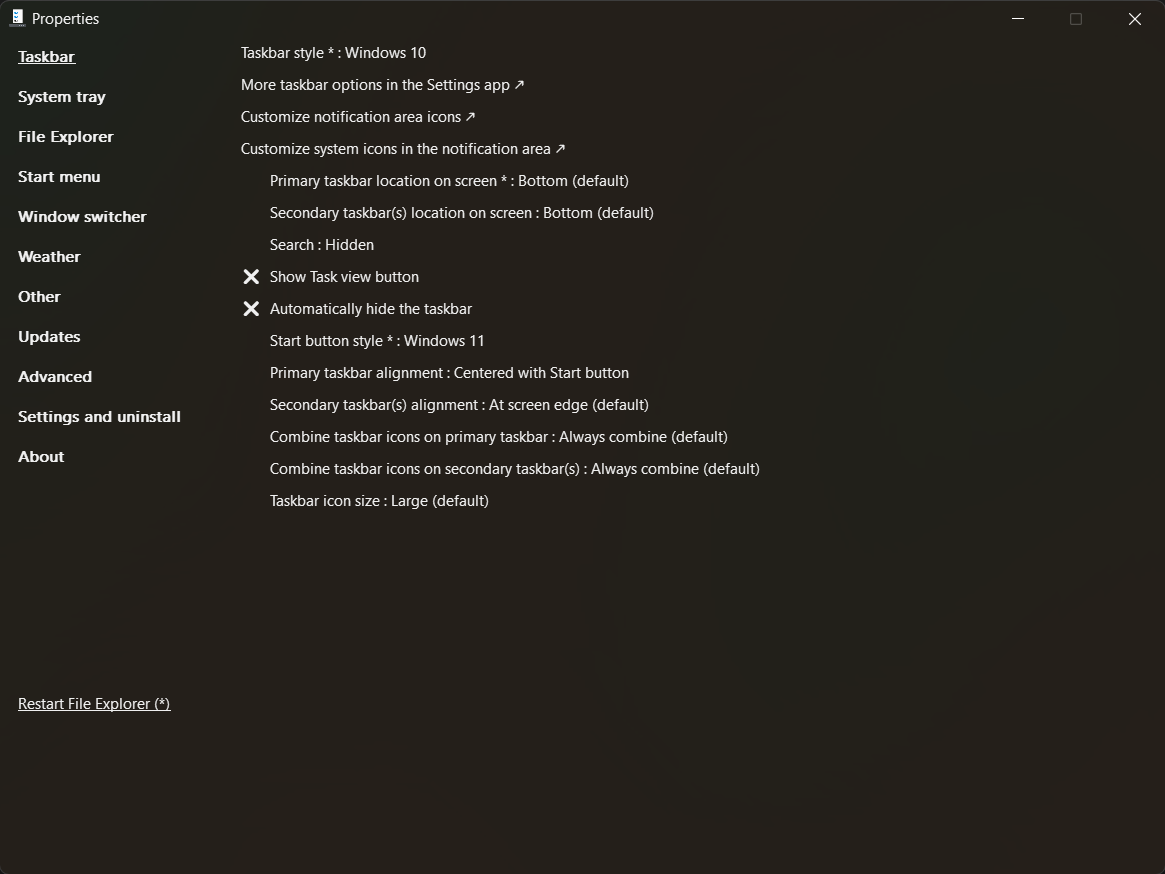
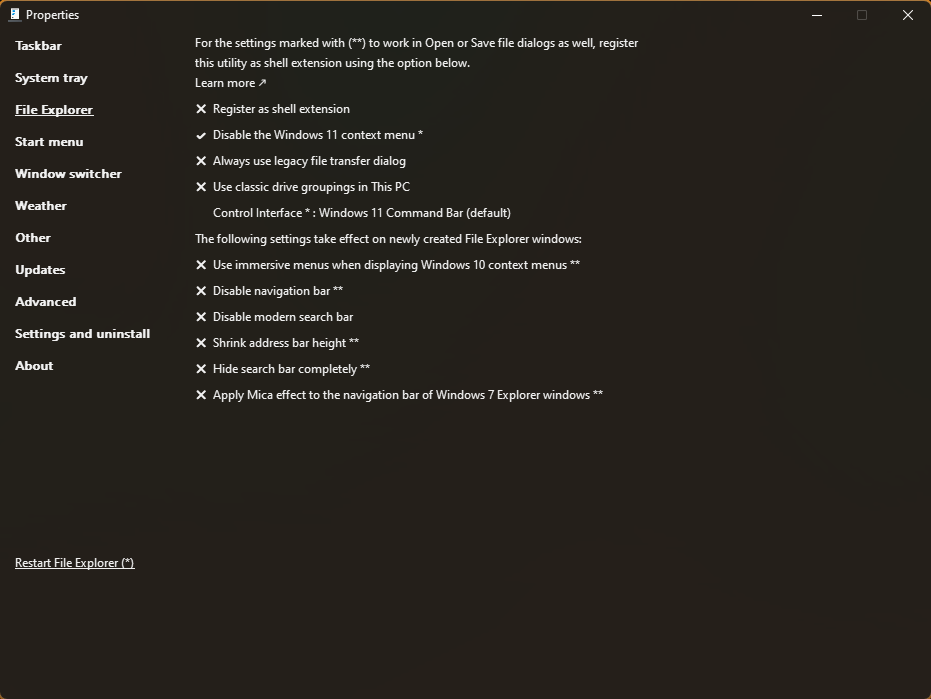
Solution: Explorer Patcher
To address the regression of the taskbar and context menu, I use Explorer Patcher. This allows you to bring back some of the Windows 10 UI and explorer elements. Most importantly, it lets you get rid of the Windows 11 right-click context menu in favor of the Windows 10 version. I personally like having one single taskbar on my non-primary monitor, which is not an option in Windows 11. Explorer Patcher brings that option back.
No Centralized Package Management
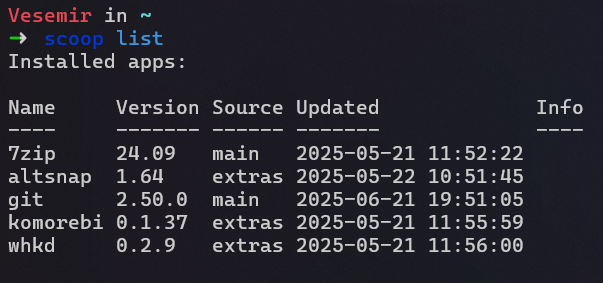
Solution: Scoop
Scoop is an extensive Windows package manager with over 5,000 packages in official “buckets”. Buckets are a way to organize packages, similar to apt repositories, and there are even more unofficial buckets and applications. Other package managers exist for Windows like Chocolatey and Winget, but I prefer Scoop for its simplicity and larger software base.
Terrible Windows Search and Launcher
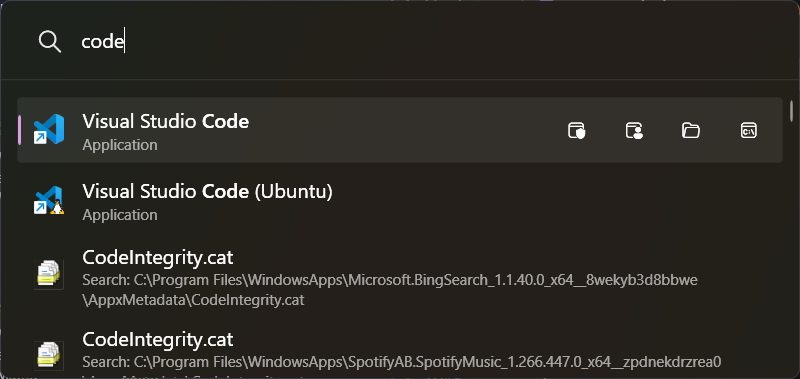
Solution: Powertoys Command Palette
Powertoys Command Palette is the new version of Powertoys Run. Command Palette allows you to quickly search for applications, files, and settings without having to open a separate window or use the Windows Search bar. It’s very reminiscent of Rofi on Linux. And while it uses the default Windows indexer, it doesn’t have the same downfalls, and I find it more accurate than the start menu search.
Closing Remarks
For those of us still in need of some of the Windows features, there are good ways to supplement important features to band-aid the various Windows issues. There are hundreds of ways to customzie Windows further and make it exactly what you want, but I hope this blog gives you some inspiration to get started on the path of “ricing out” your Windows install!